No products in the cart.
Account
Login
Cart
 Order Sample
 View Bestsellers
 Fast Delivery
White metro tiles: ideas, layouts and styling tips for 2026
White metro tiles have been a favourite in British homes for decades, and they’re just as popular today. Whether you’re planning a new bathroom, updating a kitchen splashback or looking for timeless wall tiles, this guide explores the best layouts, grout colours, finishes and design ideas to help you choose the right look. Read on!
Key takeaways
- White metro tiles remain one of the most common choices for kitchens, bathrooms and utility rooms.
- The classic 10×20 cm format suits most spaces, while 10×30 cm offers a more contemporary look.
- High gloss finishes maximise light in smaller rooms, whereas satin finishes create a softer, more understated appearance.
- Brick bond is the timeless layout, while herringbone and vertical stack patterns provide a more distinctive finish.
- Grey grout is the most practical all-round option, white grout creates a seamless look and black grout highlights the tile layout.
- Flat metro tiles suit modern interiors, while bevelled tiles add depth and complement traditional or Shaker-style schemes.
- White metro tiles pair effortlessly with wood, dark cabinetry, stone and metal finishes, making them suitable for a wide range of interior styles.
Why are white metro tiles a classic choice?
Few tile styles have stayed relevant as long as metro tiles. Originally designed for London Underground stations and Parisian bistros in the early 1900s, the simple rectangular shape has survived a century of interior design trends without losing relevance. White metro tiles in particular have become the default choice for kitchens and bathrooms across the UK, and it is easy to see why.
They work with almost any colour scheme, which makes them low risk for anyone unsure of their final palette. They are easy to style, whether the rest of the room is minimalist, Scandinavian, industrial, classic or modern farmhouse. A white surface also reflects more light than a darker one, which helps a small kitchen or bathroom feel more open. Moreover, a glazed white tile is simple to keep clean, which matters in rooms that deal with grease, steam and daily splashes.
The timeless appeal of white metro
The appeal of white metro tiles is not a passing trend. The shape moved from London stations and continental bistros into home interiors decades ago, and it has appeared consistently in kitchen and bathroom design ever since, without ever looking dated.
The same qualities that make it popular for kitchens, easy maintenance, a neutral base and a classic proportion, also make it a strong option for metro bathroom tiles, where moisture resistance and simple cleaning matter just as much as style.
High gloss vs satin white metro tiles
The surface finish changes how a white metro tile behaves in a room, so it is worth deciding on this before you decide on layout or grout.
High gloss reflects light and makes a room feel larger, which is particularly useful in small bathrooms or kitchens without much natural light. The trade-off is that a glossy surface shows fingerprints and watermarks more readily, so it needs a quick wipe more often.
Satin, sometimes labelled matt, gives a softer, more muted look. It hides everyday marks better than gloss and tends to suit larger rooms or a farmhouse and rustic style, where a heavy shine would feel improper.
If you are drawn to a reflective finish, browse our range of white gloss tiles for kitchen and bathroom use. As a general rule, gloss works best in compact spaces that need extra brightness, while satin suits bigger rooms that already get good light.
Flat vs bevelled white metro: which is right for you
The tile profile is the other major decision. Flat metro tiles have straight, even edges and sit close to the wall, giving a clean, modern look that suits minimalist and Scandinavian interiors.
Bevelled tiles have an angled edge that catches light along the grout line, giving each tile a subtle three-dimensional look. This makes bevelled metro a better fit for classic, retro and Shaker style kitchens, where that extra texture and shadow line add character.
Neither option is objectively better, it depends on the effect you want. For a full breakdown of both styles, see our guide: Bevelled vs flat metro tiles.
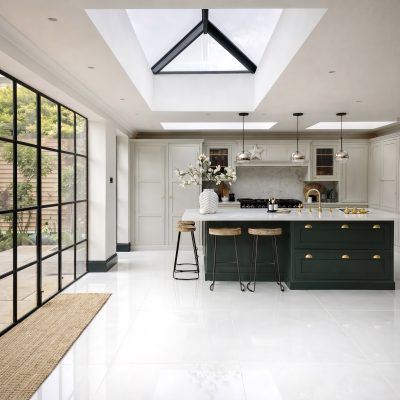


Layout patterns for white metro tiles
Choosing the right one of several metro tile layouts changes the character of a room as much as the tile colour itself, so it is worth spending time on this decision.
Brick bond (running bond) layout
This is the original metro layout, with each row offset by half a tile against the row above. It is the most popular choice for metro tiles because it looks correct in almost any space, and it works with both 10×20 cm and 10×30 cm formats. With white tiles and dark grout, the offset pattern reads clearly. If you want to soften that grid effect, choose a white or light grey grout instead.
Herringbone pattern
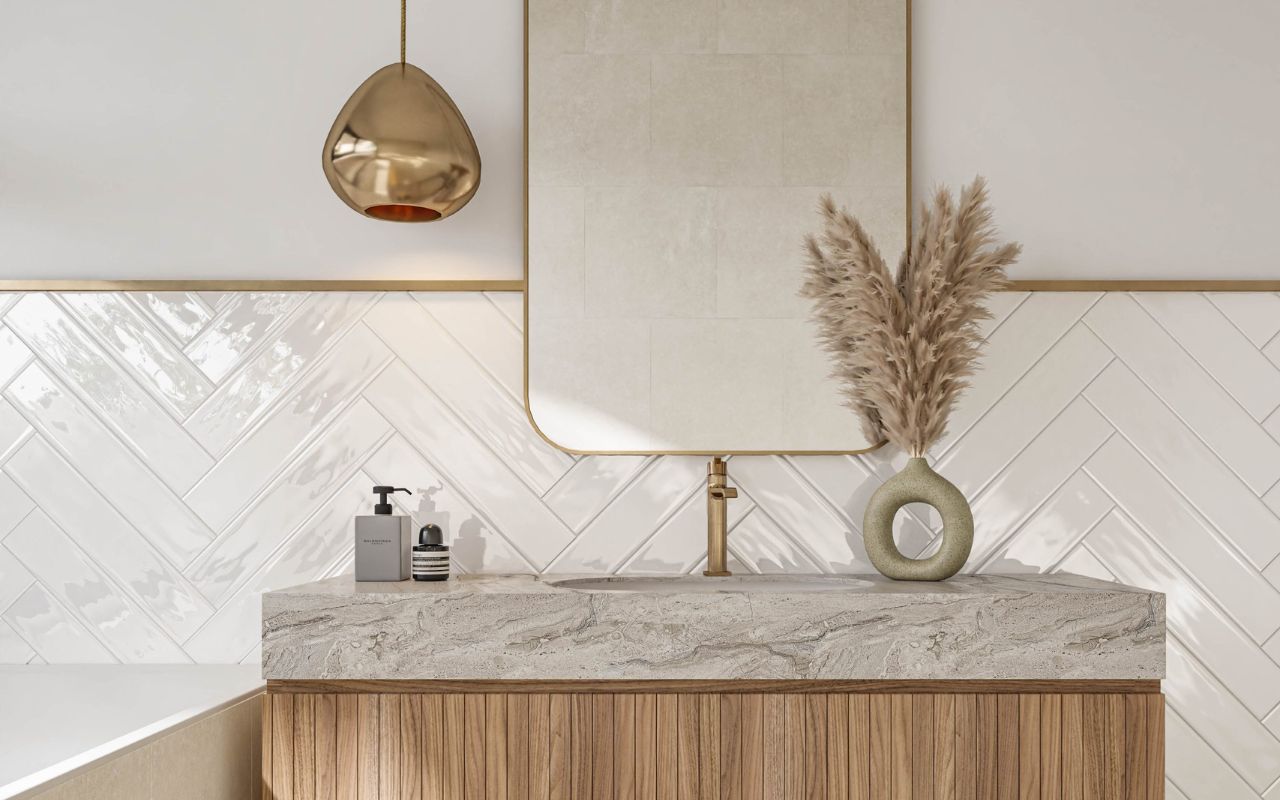
Herringbone tiles are laid at a 45-degree angle in a V shape. It is more demanding to install, with material wastage of around 10 to 15%, but the visual result is much richer than a straight layout. White metro in herringbone gives an elegant, contemporary look, and it is especially effective with bevelled 10×30 cm tiles, where the angled edges add extra texture to the pattern. With a white tile, the herringbone shape is subtle rather than shouting for attention, so grout colour becomes the main tool for controlling how much the pattern stands out.
Vertical stack layout
In a vertical stack, tiles are laid directly on top of one another with no offset, so the grout lines run in a continuous straight column. The effect makes a wall look taller, which is useful in rooms with a low ceiling. It is a more contemporary, slightly unexpected take on metro tiles, and it stands out precisely because it breaks from the usual brick bond. It does require very precise installation, since any wobble in the grout line is immediately visible.
Basket weave and other patterns
A handful of less common layouts are also worth knowing about, including basket weave, where pairs of tiles are set at right angles to create a woven effect, along with diagonal layouts and mixed sizing that combines two tile dimensions in one wall. These suit anyone looking for something more unusual than a standard brick bond. For a full visual guide to each layout, see our article: 5 creative layout patterns for metro tiles.
Grout colour guide for white metro tiles
Grout colour is one of the most common sticking points for anyone buying white metro tiles, so here is a direct recommendation for each option rather than a list of possibilities.
Dark grout with white metro: bold contrast
Black or anthracite grout against white tiles creates a strong, graphic contrast that shows off the layout pattern clearly. It suits industrial, loft and modern interiors, and it looks particularly effective with herringbone and brick bond layouts. One practical warning: dark grout on white tiles can look patchy over time if it is not properly maintained, so choose a grout with built-in stain protection.
White grout with white metro: seamless look
Matching white grout to a white tile removes the visible grid entirely, giving a smooth, almost stone like wall. This works well in small rooms, where it helps the space feel larger, and it suits minimalist and Scandinavian interiors. The downside is that white grout marks faster than darker options, especially in a kitchen near the worktop, so pick a grout with antifungal protection if it will be near a hob or sink.
Grey grout: the safe middle ground
A light or mid-grey grout sits between the two extremes, offering some contrast without the stark look of black grout or the maintenance concerns of white. It is the easiest of the three to keep looking clean, and it suits almost any interior style, which is why it remains the most common choice among fitters and homeowners alike. As a rule, the lighter the grey, the closer the effect sits to a white grout finish, and the darker the grey, the closer it moves toward the bold contrast of black.
Ready to bring home the classic look?
Explore our white metro tile range or order free samples to see the finish and colour in your own space before you buy.
White metro tiles in kitchens and bathrooms
White metro kitchen splashback ideas
A splashback is the most common place to use white metro tiles in a kitchen. The typical area runs from the worktop up to the wall units, around 60 cm high, though some kitchens use a full height wall behind the worktop instead.
White metro with dark cabinetry, navy, charcoal or bottle-green, gives a classic Shaker kitchen look. Paired with oak worktops, it leans toward a Scandi, natural feel, and combined with concrete or steel surfaces it reads as industrial. Whichever direction you choose, pick a grease resistant grout for the area directly behind the hob, since this is where daily cooking splashes will have the biggest impact.
White metro bathroom feature walls
White metro on a shower wall or behind a bath is a dependable, long-lasting choice that rarely looks improper. The effect can be strengthened with spotlighting, which catches the edges of a bevelled tile and creates soft reflections across the wall. For metro bathroom tiles, size matters more than in a kitchen: 10×20 cm suits smaller bathrooms, WCs and en suites, while 10×30 cm reads better in larger rooms. In a small, windowless bathroom, a high gloss finish with white grout will do the most to maximise brightness.
White metro in hallways and utility rooms
Hallways and utility rooms are less commonly discussed but genuinely practical places for white metro tiles. In a narrow hallway, white metro visually widens and brightens the space, which matters in period properties where hallways are often tight. In a utility room, the same tile is easy to clean and copes well with damp, making it a sensible choice around a sink or washing machine. In hallways specifically, a vertical stack layout is worth considering, since the tall, uninterrupted grout lines help the walls feel higher than they are.
Conclusion
White metro tiles have earned their reputation as a timeless design choice thanks to their flexibility, practicality and ability to complement almost any interior style. Whether you prefer a traditional brick bond layout, a contemporary vertical stack or an eye-catching herringbone pattern, the right combination of finish, grout colour and tile profile can completely transform a space. By choosing the layout and style that best suits your room, you’ll create a kitchen or bathroom that feels fresh, functional and just as relevant for years to come.
FAQ
What size are white metro tiles?
The most common sizes are 10×20 cm, the classic metro proportion, 10×30 cm, a longer, more contemporary format, and 7.5×30 cm, a textured alternative for a bit more character. In the UK, 10×20 cm remains the most widely used size for both kitchens and bathrooms, largely because it suits the widest range of room sizes and layouts.
Are white metro tiles suitable for floors?
Standard white metro tiles are designed for walls and usually do not carry the slip resistance rating required for floor use. They should be kept to walls unless a specific product listing confirms it is rated for floors. Always check the technical specification of the exact tile you are ordering rather than assuming it can be used underfoot.
What grout colour goes best with white metro tiles?
It depends on the effect you want. Dark grout gives a bold, graphic contrast that suits industrial interiors, white grout gives a seamless, minimalist look, and grey grout offers an easy to maintain middle ground that suits almost any style. For most projects, grey is the safest default, since it balances appearance with practicality.
What is the difference between flat and bevelled white metro tiles?
Flat tiles have straight, even edges for a modern, minimalist finish, while bevelled tiles have an angled edge that catches light and adds a more classic, decorative look.
How many white metro tiles do I need per m²?
At 10×20 cm you will need around 50 tiles per m², at 10×30 cm around 33 tiles per m², and at 7.5×30 cm around 44 tiles per m². Always add roughly 10% extra to allow for cuts and breakages, and increase that to 15% if you are laying a herringbone pattern, which produces more waste.